A guide on how to make high quality CS Screenshots
Topic: How To Make Good Screenshots in Counter-Strike
Whether you are using a screenshot to advertise a skin you want to sell, or just want to show off your new skin to your friends, taking high resolution screenshots is a vital skill for any serious CS:GO/CS2 skin collector or trader. Luckily, EsportFire has adapted a guide from @tofu to make taking high-resolution screenshots simple and achievable.

Step 1: Maximize Resolution Prior to Launching
Before you even open CS:GO/CS2 to take your screenshots, you need to maximize your monitor resolution to ensure the highest quality screenshots. Using the Nvidia Control Panel, you can increase your monitors resolution by up to 4x its native resolution:
- Navigate to the Nvidia Control Panel(right click your desktop and select Nvidia Control Panel)
- Select Manage 3D Settings under the 3D settings header
- Select DSR - Factors in the Manage 3D Settings menu
- Scroll down to the bottom of the DSR popup menu and select the maximum setting(often 4x)
- Select Apply and wait until the Apply option disappears to ensure the changes have been made
Step 2: Change Resolution in Game
The previous step is useless if you dont also change your in-game resolution. To do this, launch CS:GO or CS2, go to your Settings and select Video, then click the Resolution option and change it to the best possible resolution.

Step 3: Find the Perfect Screenshot Map
One of the most important parts of making the perfect screenshot is using a map with good lighting and backgrounds. An open map with lots of lighting creates more saturation and helps to make the skin “shine.” Along with this, having a good background allows the skin to really pop.
There are lots of maps that offer great lighting, but no map compares to EsportFire’s official Skin Server. It features over 100 awesome backgrounds, guaranteeing that you will always have the perfect background for the skin you are screenshotting. Along with this, you can use !gloves and !agent to change the gloves and agent skins you are using, another feature to help make your skins look amazing! To join the server, join our Discord and navigate to #skinserver, where you can join one of our four skin servers located in Europe, Asia, and North America.
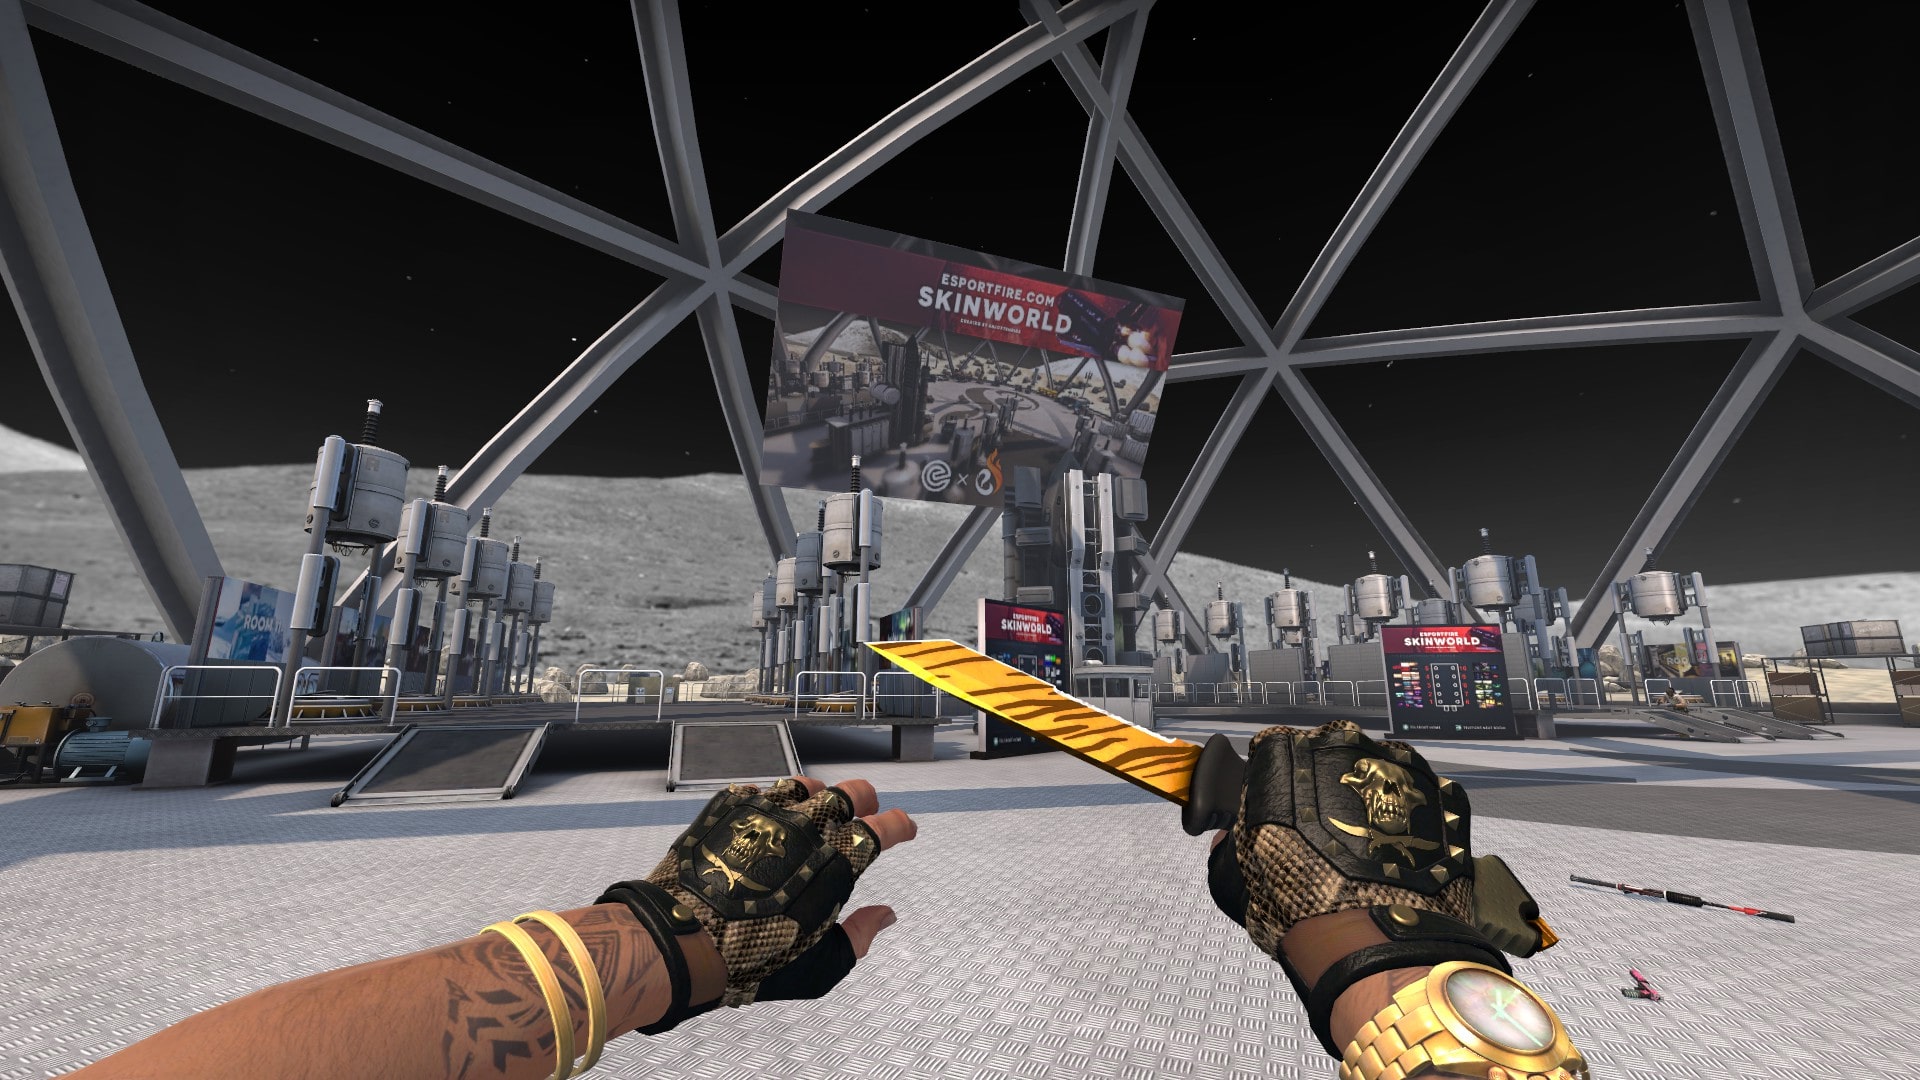
There are lots of maps that offer great lighting, but no map compares to EsportFire’s official Skin Server. It features over 100 awesome backgrounds, guaranteeing that you will always have the perfect background for the skin you are screenshotting. Along with this, you can use !gloves and !agent to change the gloves and agent skins you are using, another feature to help make your skins look amazing! To join the server, join our Discord and navigate to #skinserver, where you can join one of our four skin servers located in Europe, Asia, and North America.
Step 4A: Generating Your Skin With Inspect Link
If you already have the skin you want to screenshot, just equip it and purchase it as if you were in a game.
However, if you want to take a screenshot of a skin that is not in your inventory, go to the inventory where the skin is, find the skin you want to inspect, and right click on Inspect in Game. Then, just copy the link and paste it into the chat on the inspect server.
However, if you want to take a screenshot of a skin that is not in your inventory, go to the inventory where the skin is, find the skin you want to inspect, and right click on Inspect in Game. Then, just copy the link and paste it into the chat on the inspect server.
Step 4B: Generating Your Skin With !gen Code
If you do not know which inventory the skin is located in, or the skin doesn't exist yet and you want to see what it looks like in game, you can always use a !gen code. To get a !gen code:
- Navigate to BroSkins.com
- Select "Craft"
- In the skin box, search for the skin
- If the skin has stickers, search for the stickers and select them
- Once you have completed the craft in BroSkins, copy the !gen code
- Paste the !gen code into the chat on the inspect server.
Step 5: Turning Off Your HUD
If you want a good screenshot, you don’t want your health bar, map, and other HUD components on the screen. To disable them, open the developer console by clicking ~ and type cl_drawhud 0. If you have the net graph enabled, you will need to disable it by typing net_graph 0 in the console.
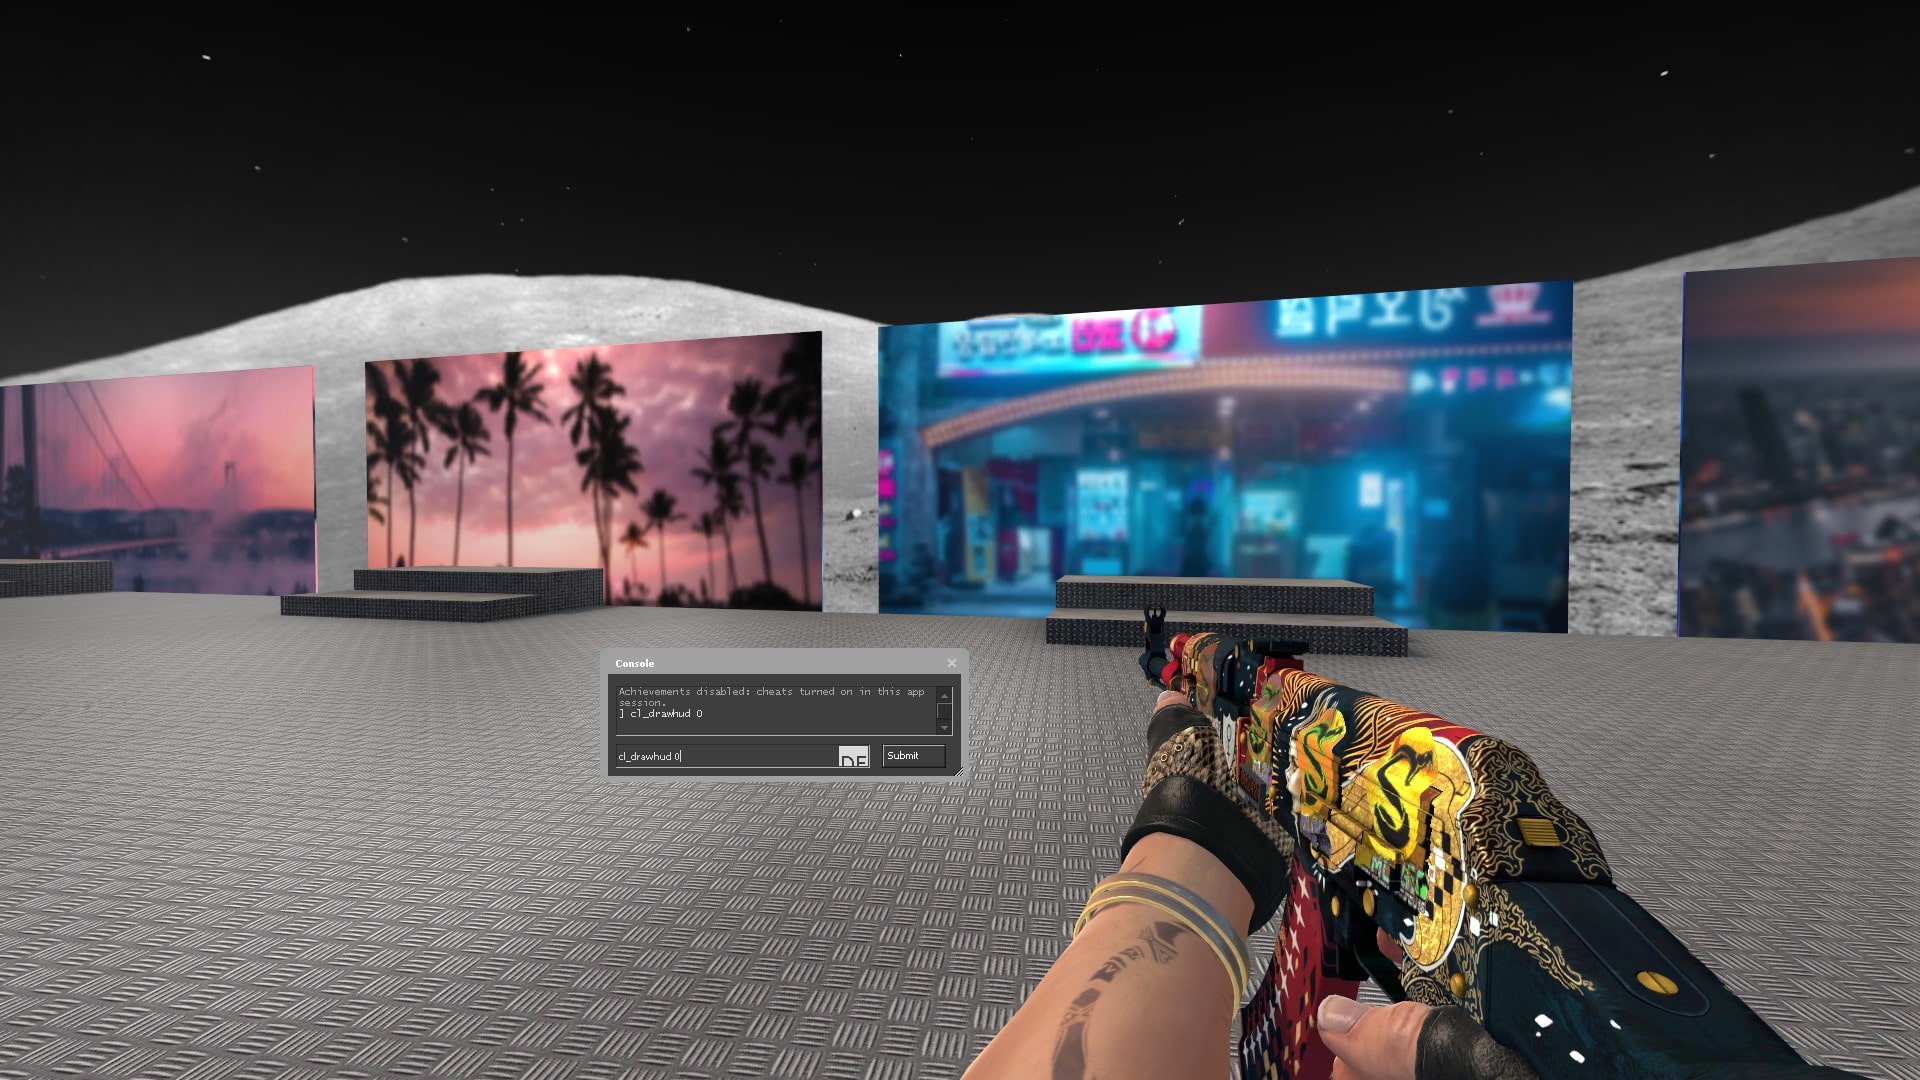
Step 6: Viewmodel Manipulation
Once your HUD is disabled, you can take further steps to manipulate your viewmodel and take even better screenshots. Start by typing cl_lock_camera 1 into the console, which will lock your camera but allow you to still move your viewmodel, giving you the ability to achieve great angles. You can also use the cl_pitchdown and cl_pitchup commands in the developer console to move your viewmodel in any direction. You can even use the fov_cs_debug x command (Where X is your FOV, with a default of 90), which allows you to make zoomed in our out screenshots.
Step 7: Take the Screenshot
Once you have found the perfect angle, background, and lighting, removed your HUD, and manipulated your viewmodel, you can take the screenshot. Do this by clicking F12 on your keyboard (fn + F12 on Mac). In the top right corner of your screen, you will see that a screenshot has been taken! You can press Shift + Tab to open the Steam overlay and view your screenshots there to ensure you have the perfect screenshot.
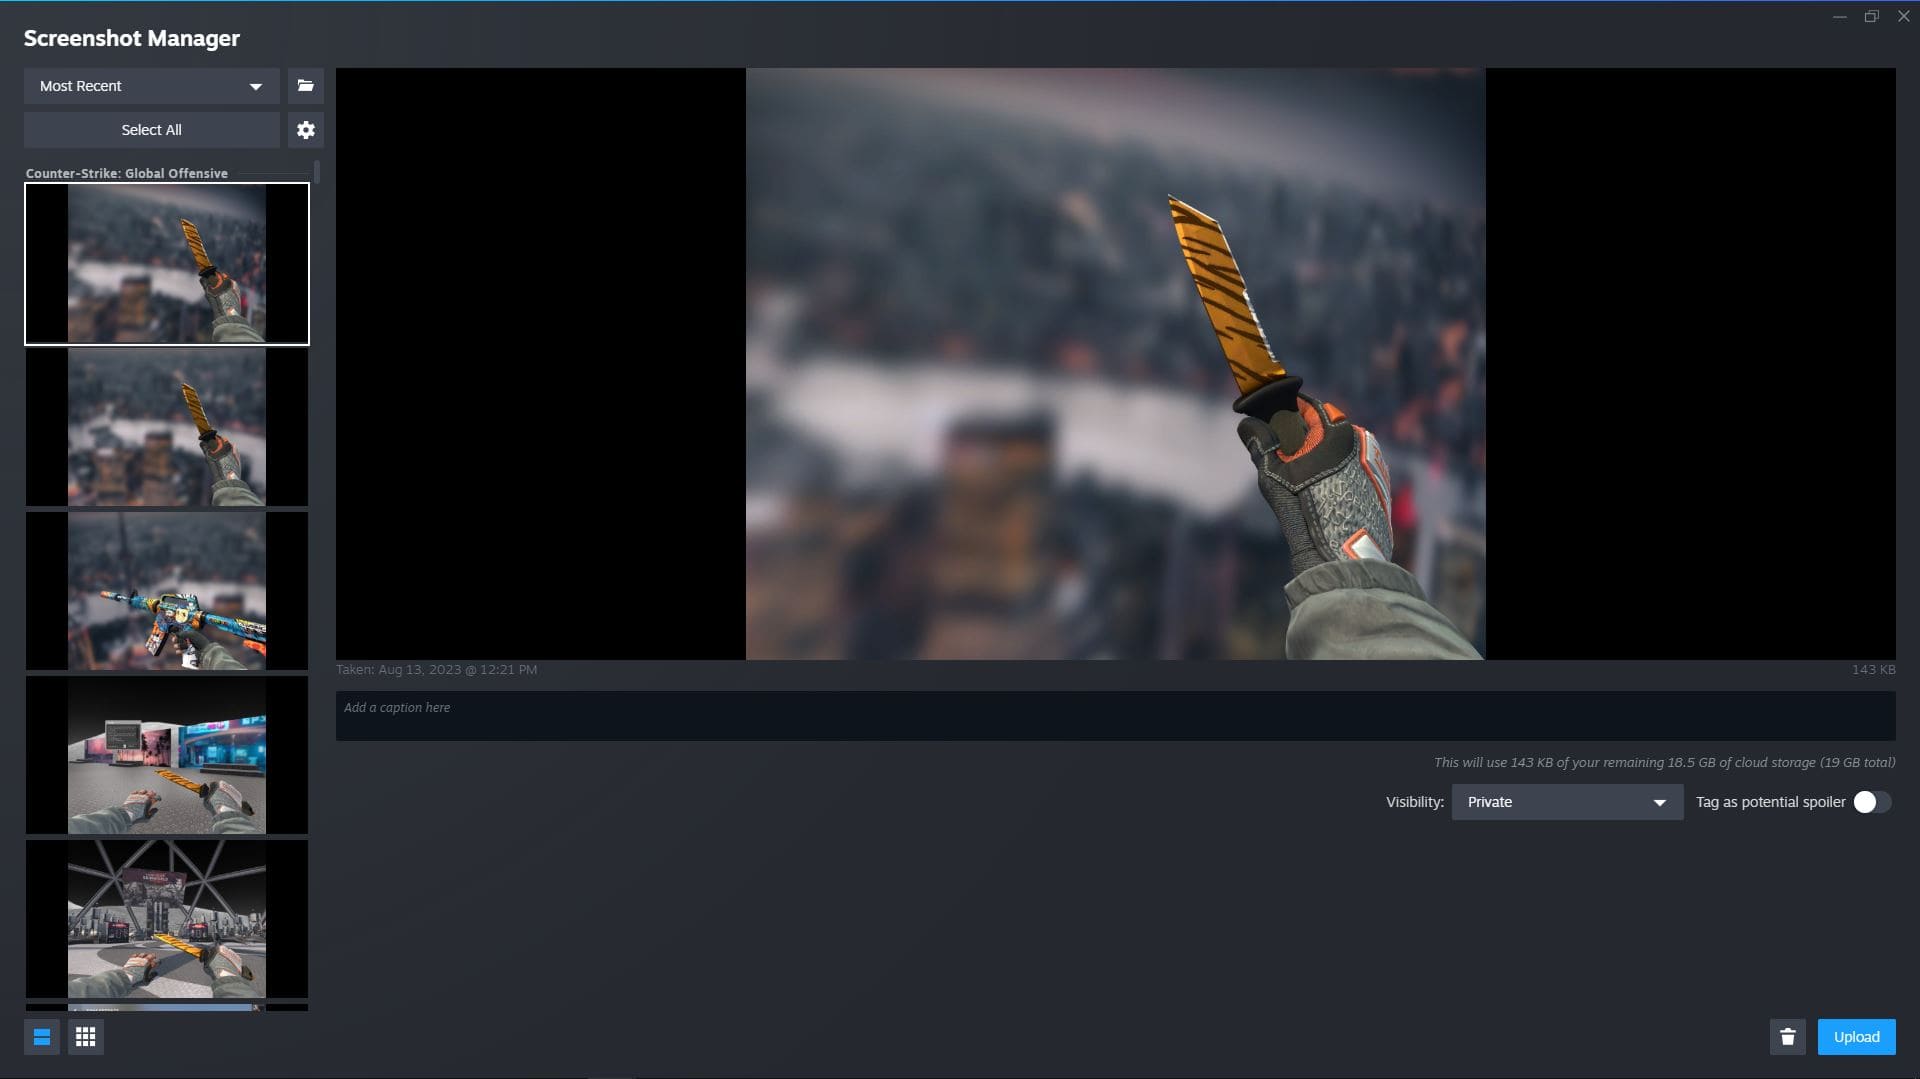
Step 8: Finding and Downloading your Screenshot
Once you have taken the screenshot, open Steam, select View, and click Screenshots. This will open a menu with all of your screenshots, and from here you can download them onto your desktop and share them on social media.
Conclusion
We hope that now, everybody knows how to make good screenshots in CS to share your skins with the world! If you enjoyed this article make sure to check out other recent ones right below this paragraph.